Saturday, October 30, 2010

Definitive Answers about TA Track Crank BB Length; and Jocelyn Lovell Bike: Third Look

First things first: let no one every again wonder what bottom bracket spindle length to use with a TA Pro 5 Vis "Cyclotouriste" Track/Piste/Pista cranks (abundance of words to help Googling.) The answer is: 107mm JIS. Using a Shimano UN72 bottom bracket, this gave me exactly 42mm chainline. Now, mine are newer-production arms with laser etchings, and from what I understand, the newer ones occasionally need longer spindles than the older production. But any shorter than 107 and the spider would bottom out against even the remarkably low-profile UN72. So I can confidently say: pretty much anyone with TA cranks, with the exception of some hypothetical people with laser-etched arms different from mine: use a 107mm JIS spindle. (So much for TA's recommendation of 111.5mm—maybe they were talking about ISO taper BBs to fit in their JIS-taper crank arms. They're a funny company.) And do use really low-profile BBs like the Shimanos. The SKF 107 would NOT work: the "fixed cup" side sticks out too far, and the spider would bottom out.

Well, that's settled. Here's a look at the first iteration of Jocelyn Lovell Bike's build. I'm happy with most of it except (a) the tape colour, which is too brown—I'm already about 15 coats of clear shellac in to fixing this problem, and (b) the Wippermann Connex chain has a lousy master link, which I had to remove since it severely messed up my drive train. Who needs master links anyway, though, on big fat healthy chains? More photos of the bike when I'm completely happy with it.

Monday, October 25, 2010

Jocelyn Lovell Bike: Second Look

Some direct sunlight brought with it a better chance to take nice photos of this brilliantly painted bike. Here they are.

I had been planning on using the polished Dura Ace track cranks I used on Niles... but one look at these TAs up against the frame and I was convinced.

The only problem is getting the BB spindle length right. Some rough measurements suggest 107mm is going to be the way to go with these arms (the newer production ones). Unfortunately I can't use an SKF—the way the fixed cups are designed would make the spider bottom out.

Thank you, Wyndham Lewis.

Thank you, typeface designers at the Bauhaus, French logo-makers, Wes Anderson, and people who know Illustrator better than me.

It's a shame the 531 decal won't be in plain view—but the painted Silca is actually probably prettier. Lots of nice points at the seatlug...

Pump and seat tube.

Bottom bracket area. (That half-installed SKF, a 116mm one, is definitely not staying. Too bad, as the non-DS "cup" is red anodized and would match!)

Schopenhauer and Jocelyn Lovell Bike: casting shadows.

Sunday, October 24, 2010

Jocelyn Lovell Bike: First Look

I went to pick up the completed frame today from Noah at Velocolour. I must say, I was totally blown away at how beautiful it looks. I remember Doug Fattic telling me that the key to success in frame building is very simple: have a good painter. I think Noah has made me look very good.

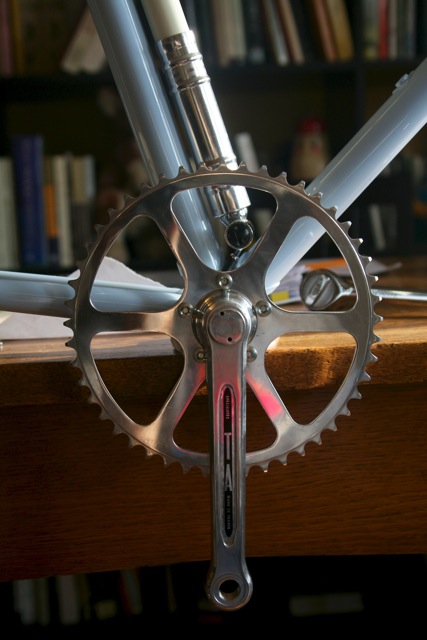
I doubt the colours will come across that well in these indoor shots, but they're absolutely beautiful. The blue is very light, the cream very creamy, and the red nice and bright. The masked headtube looks wonderful, and the painted pump is fantastic—I'd thought about having a panel on the seat tube, but this sort of has the panel effect while preserving the minimalist feel.


Noah used masks instead of decals, and the logos all came out looking great. I love the way the red jumps out of that massive white headtube. (And the Mafac spring retainers look so good that they almost seem worth the incredible effort...)

Again, not the greatest photo—but you can see the white-painted triangles on the Nervex crown, the 531 fork decal, and a bit of the downtube logo. Literally every possible tube on this bike is 531: all the frame tubes, the chain and seat stays, the steerer, the head tube, and the fork blades.

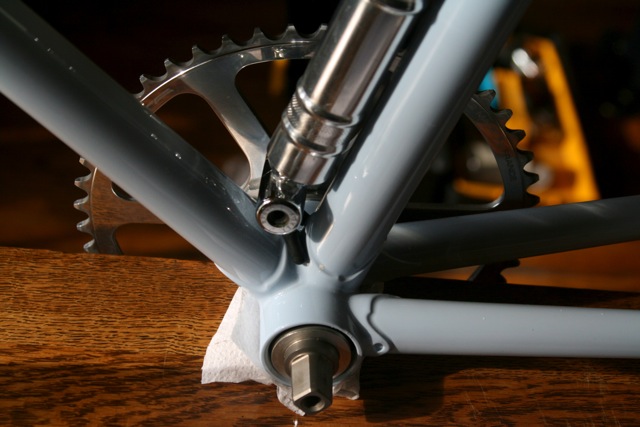
A better look at the fork and the lower headlug. I'm very proud of how nice the crown looks now, given how ugly it was when I started with it. (My lug work is far from flawless, but isn't so bad. I generally like the shapes, even if they're not filed as thin as I'd ideally like them.)

The colour contrast is really, really nice!

This is the other creative paint detail: the tops of the tack ends are painted white. I hear that a few people who've seen the bike in the shop have commented on the angle of the dropouts/track ends—they should be parallel to the ground with the TT level (so that the head tube angle/BB height is constant regardless of the position of the rear wheel), but they're angled with the chainstays, like on a normal bike (so that the rim stays in line with the brake pads). It's a minor thing and it won't bug me too much—and I was only following the angle of the track ends themselves.

So now it's time to build it up—I have a feeling JL will look even better with all his parts. I'll have some professional-quality photos taken when it's ready.

Monday, October 4, 2010

Jocelyn Lovell Bike in Primer

Noah from Velocolour sent me some pictures last night of my frame in primer. It's really useful as a learning exercise to see things at this stage. As tricky as it is to actually file lugs flat and evenly thin, one of the hardest things is just having a way of telling if you've done a good job or not. Primer seems to bring out all the imperfections very clearly. (And then a good painter hides all of those imperfections, and makes you look like a genius when all the painting is done.)

There's the bike from far away, where everything of course looks very nice. That's truly a massive head tube.

This is the inside tang of the fork crown. I knew the old Nervex crown had some "holes" in it, from the casting process that produced it. But I didn't realize how bad it looked! I should have added brass before brazing.

It looks like I simply forgot to clean up my filing on the (drive side!!) seat lug before attaching the stays. Really rough and ugly in there! The shorelines are a bit on the gobby side too, which is actually a bit of a surprise. The reinforced binder looks pretty rough as well, though probably the ugly stuff will be hidden by the actual binder. This picture definitely makes me wish I had a sandblaster, which would even things out enough so that I would be able to see mistakes like these.

This one's not too bad (and it should look good, being the drive side lower headlug), but the edges could be filed better, and there's a brazing gob along the shoreline.

Very useful to see this now, since I'm working on filing the lugs for the Greg Curnoe bike right now. Patience pays off in lug filing, I see, and the ridiculous among of time it takes to do it right is worth it.